Automation
DemoTime can automatically send the generated highlight-reel videos (and decks) to your contacts.
Getting Started
On the DemoTime app home page you should see three boxes:
1) The first box shows the meeting tool(s) you've connected, e.g. Zoom
2) The second box shows what features of your app DemoTime looks for to generate the highlight-reel videos
3) The third box contains the automation settings
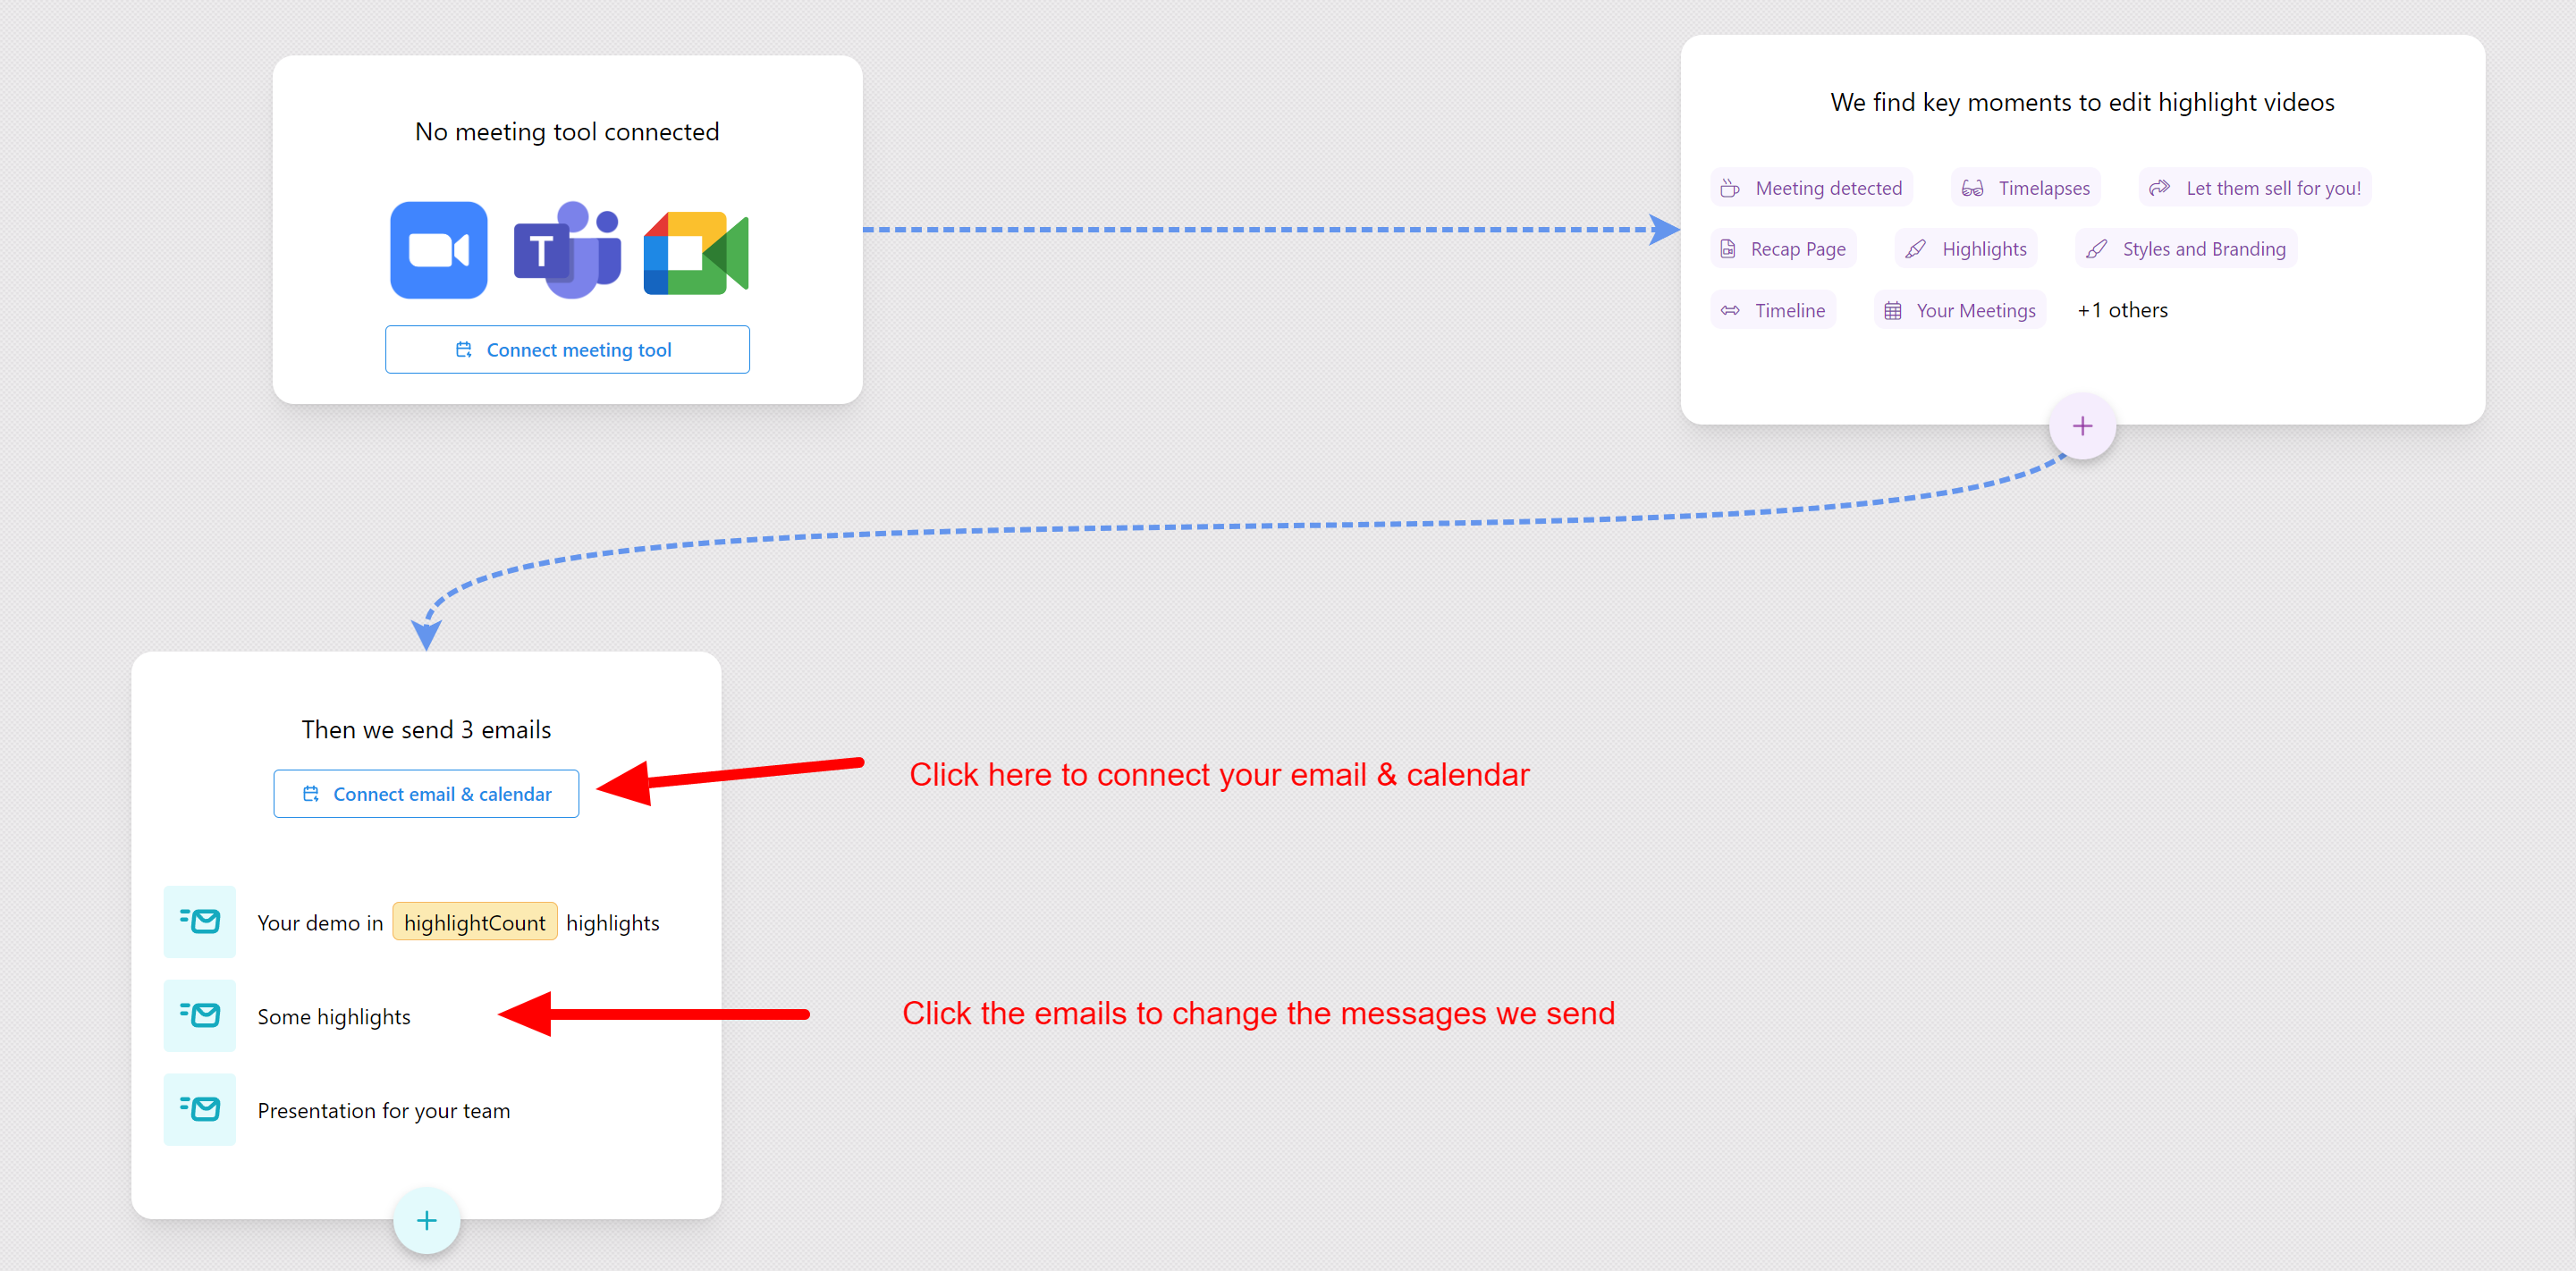
Connect your Calendar & Email
Why we need this?
- We need access to your calendar so we can find out who attended the meeting (platforms like Zoom don't send or always have this info)
- We need access to your email to send the highlights on your behalf. (This is optional. You can also set emails to go from us)
How to connect?
Just click Connect email and calendar and choose your provider. Typically this is either Google (if your org uses Gmail, etc.) or Microsoft (if your org uses Outlook, Office 365, Exchange etc.)
Configure the emails
Clicking an email in the automation box will open it in a modal window:
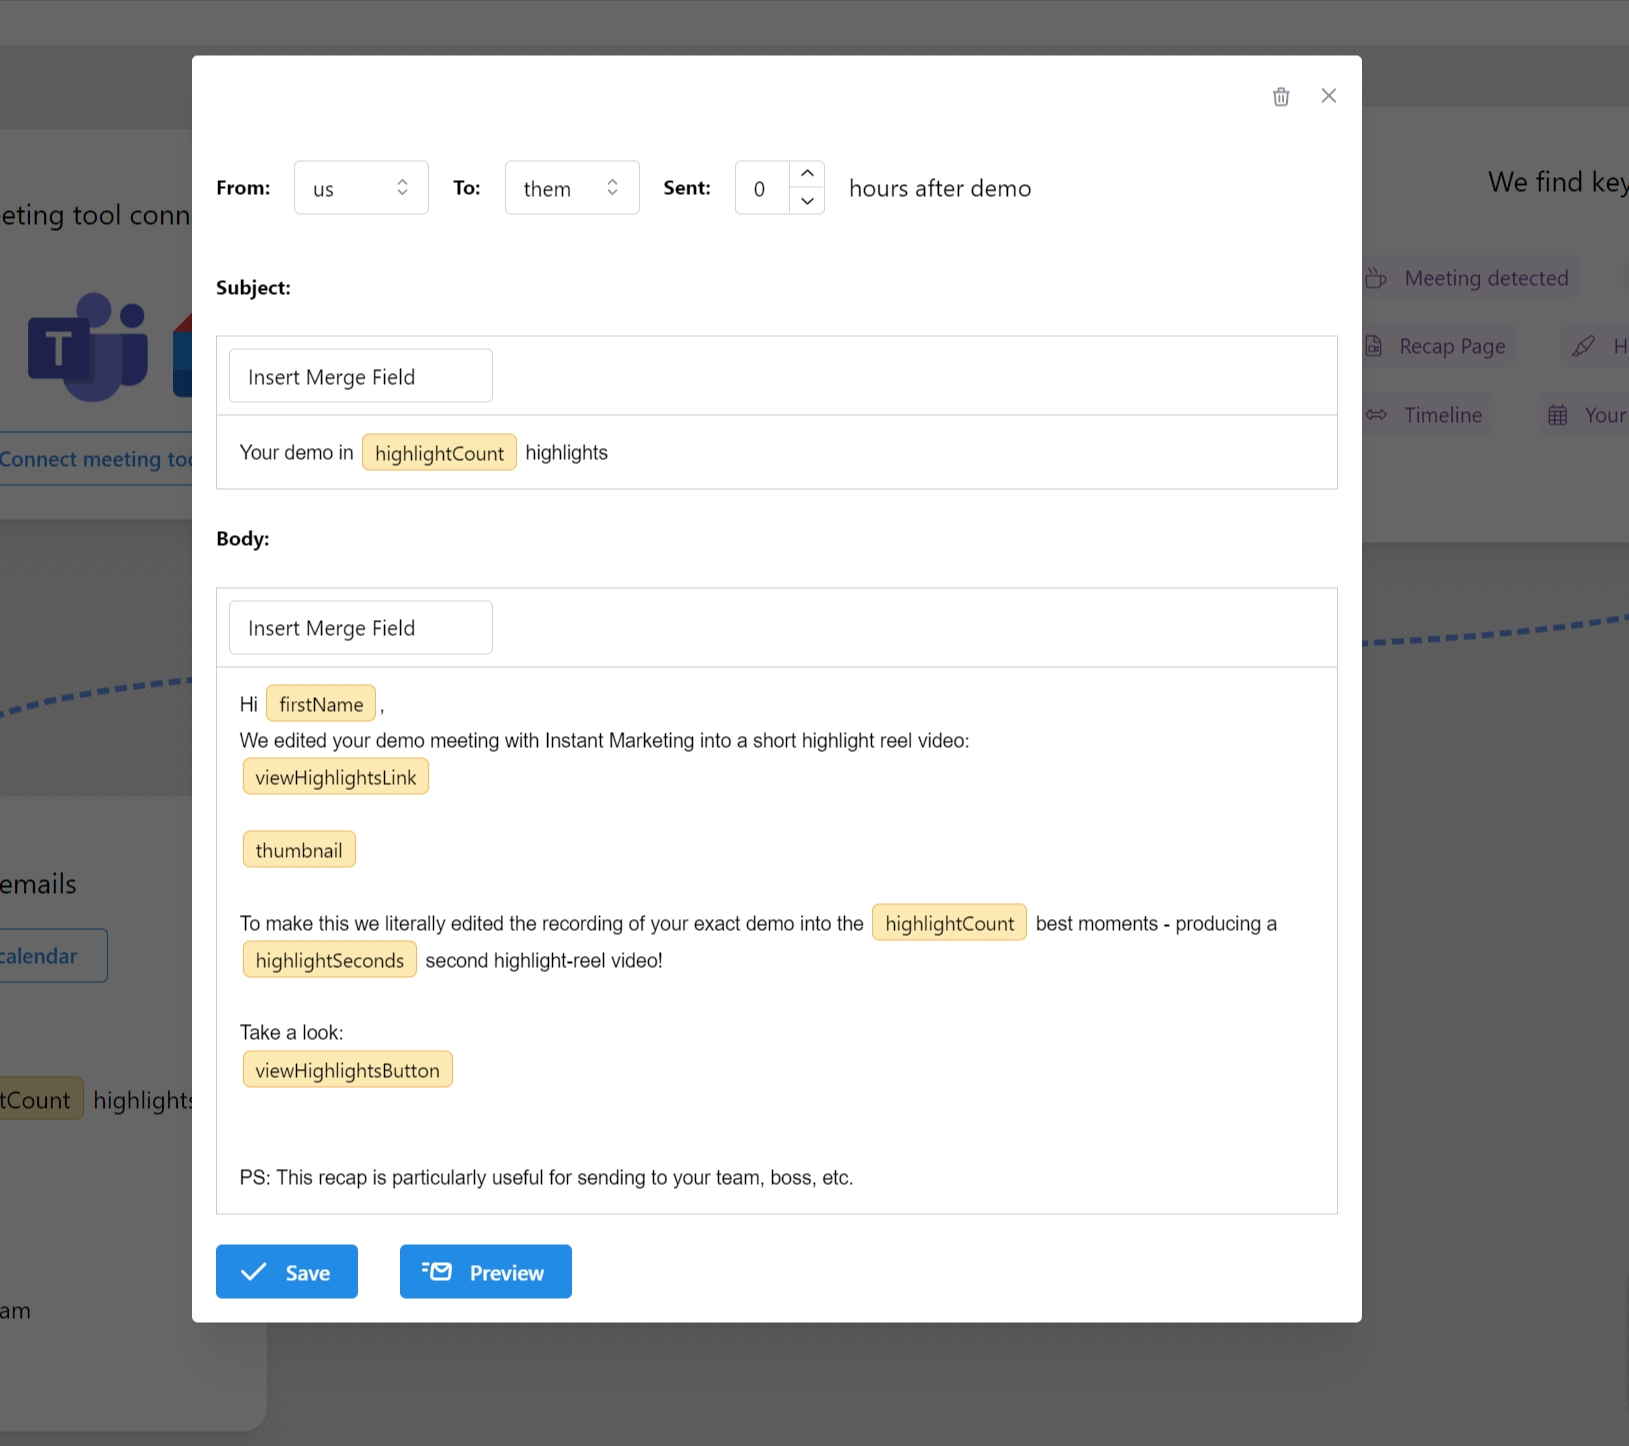
Default emails
You will notice we create some best-practice emails by default. You can leave them alone or edit them as you see fit.
Let's go through what these settings mean:
From
You can choose whether the email goes from us (DemoTime is the sender) or directly from you. As well as the sender this changes the overall template. Emails sent from us are more graphical (as you would expect from a service). Emails sent from you are simpler, as if you typed them in Outlook/Gmail etc. yourself.
Sent x hours after demo
This is how many hours we should wait after the demo before sending the email.
Remember - it takes us about an hour to build the recap. So if you set it to 0 it will send as soon as it's ready.
If you set it to 24, it will send 24h after the demo.
By default we send an email immediately and a reminder after 24h
Merge fields
You see the yellow boxes in the screenshot? Those are merge fields. They represent a field which we will dynamically replace with the correct value.
To insert a merge-field, click Insert Merge Field and select the option to insert.
firstName
This is the attendee's first name
viewHighlightsLink
This is a link to the generated highlight-reel video & associated landing page
thumbnail
This is a graphical link with a thumbnail of the highlight-reel video (it's recommended to have this on its own line, with a blank line on either side)
highlightCount
This is the number of highlights we found & rendered
highlightSeconds
This is total duration in seconds of the video highlight-reel we rendered
viewHighlightsButton
This is a clickable button which links to the highlight-reel video & associated landing page
Save Changes
To save changes just click the blue Save button at the bottom of the modal window.
Preview
To see a preview of the email, click the Preview button at the bottom of the modal window. This will replace field merges with example data so you can see what the email will look like.
New Email
To create a new email, click the round blue + button at the bottom of the automations area.
Delete Email
To delete the email, look for the trash-can icon in the top right of the modal window